If you bought and stacked up a ton of PS Now subscriptions to get 50% off the upcoming PS Plus rollout, it looks like you beat the system. Congrats!
Following the announcement of the overhaul, deals maestro @Wario64 spotted a loophole that essentially let players get an annual PS Plus Premium subscription for half price.
The revamped PS Plus service will migrate current PS Now subscribers to the top tier PS Plus Premium membership. There's a huge price discrepancy between the two, so savvy shoppers swarmed to take advantage of the situation before Sony shut it down. But it looks like anyone who partook is going to make out like a bandit.

A screenshot of an email reportedly being sent out to PlayStation Plus subscribers was posted to ResetEra . It appears to confirm that members will "keep any stacked subscription period" they've already paid for (highlighted in red).
As a member myself, I also got a PS Plus email update, although mine didn't read the same as the one above. Sony hasn't weighed in to say it won't honor paid stacked subscriptions, so there's no reason to doubt the validity of the email. But it is odd that it's not the same one being out across the board.
How did the PS Plus loophole work?
Sony confirmed that existing PS Plus members will get moved over to the base PS Plus Essential plan. Meanwhile, PS Now members will transition to the top-tier PS Plus Premium service.
PS Now comes in at $59.99 / £49.99 per year, while PS Plus Premium is priced at $119.99 / £99.99 per year. You can see where this is going.
Shortly after news broke of the restructured plan rolling out this summer , people rushed to snap up and stack up as many PS Now annual subscriptions as possible. Some managed to horde up to 10-years' worth of memberships before Sony figured out what was happening and shut the operation down.
That means they bagged multiple annual subscriptions to the most expensive and all-encompassing PS Plus tier for half price.
We've reached out to Sony again to get clarification on whether it'll honor stacked subscriptions, but it seems that this will most likely be the case for now. So, if you were quick off the mark, you've potentially saved yourself hundreds of dollars for the foreseeable future. Let's just hope you don't get the sudden urge to ditch your PS5 for an Xbox Series X five years into the console cycle.
9 hidden iOS tricks that every iPhone user should know
Apple’s iOS has come a long way from its iPhoneOS starting point, and all of the best iPhones have built on the operating system’s initial promise. Steve Jobs demonstrated the power of the iPhone in 2007 with a huge on-stage Starbucks order, and the platform has grown year after year with each update adding new features.
Multitasking, the notification and Control Center, and even the App Store, were all added to the iPhone after its first iteration, and that rapid pace of innovation can make it hard to keep up with new features.
With that in mind, we’ve put together this list of useful features you may have missed. Some are accessibility options, some need to be enabled, and others are just waiting to be used. All of them, though, will make your iPhone experience better.
1. Use a cursor to select text

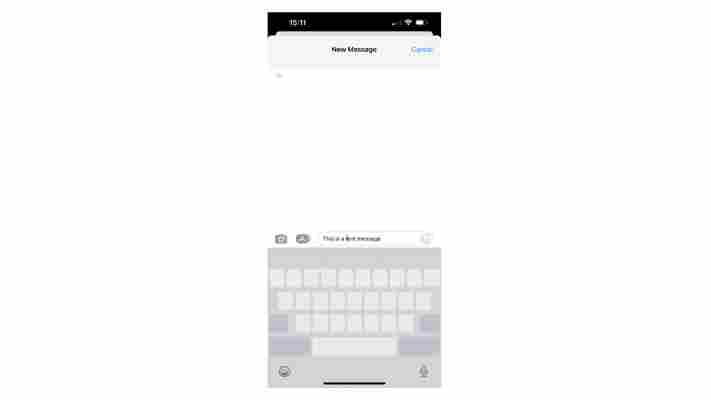
Texting is a way of life, but it’s still surprisingly cumbersome even at the best of times. If you’ve ever had an errant word added by autocorrect but not spotted it until you’ve written a few dozen words more, this tip is for you.
Sure, you can hold your finger to the text to jump to it, but this can occasionally lead to highlighting an entire word or sentence. For more granular control, we’d recommend the following:
Hey presto, easy text selection!
2. Create text snippets

Text snippets are popular for macOS power users, but you can achieve the same result with your iPhone. Better yet, it doesn’t require any third-party software.
Text snippets are ideal shortcuts for copying in certain phrases you’ve pre-registered. If you’re dealing with a client via iMessage, for example, you may want to send a standardized response. With text replacement, you can create a block of text to be posted whenever you type a phrase.
In our example, you can see that typing 'omw' brings up 'On my way!', but there are plenty of places where this would be useful. You can also set emoji to appear when you type, which feels pleasantly nostalgic in a way you just don’t get from the emoji picker.
3. Enable the scientific calculator

The iPad may not feature a calculator, but the iPhone does. The trouble is, it can feel a tad limiting outside of addition, subtraction, multiplication and division – at least until you find a new perspective.
Turning your iPhone to the side with the calculator app open will enable the scientific calculator. This adds brackets, square roots, cos/sin/tan options, and the ever-handy π command, among plenty of others.
4. Enable an additional ‘button’
While intended as an accessibility feature, the iPhone’s ‘back tap’ button is handy for power users looking for additional input for their device.
You can use this in a number of ways, such as triggering the App Switcher, snapping a quick screenshot, or opening Spotlight search from anywhere on your device. There are also double and triple tap options, meaning you can set multiple functions for it.
5. Use your camera’s 'Burst Mode'
Your iPhone’s camera is plenty powerful enough, but there’s one trick you may have missed: Burst Mode. Burst mode, as the name suggests, takes a series of rapid-fire images in one press which means your iPhone can capture a series of action shots.
It’s ideal for pets and excitable toddlers, letting you go back and look at your pictures after the event and pick out the best ones. It’s easy to access, too. Just slide the Shutter button (the one you use to take photos) to the left when you’re in the Camera app.
You can also head into Settings, then Camera, and toggle Use Volume Up for Burst to allow your volume rocker to trigger Burst mode – just hold it when you’re taking an image.
6. Scan documents using the camera
Your iPhone’s camera can double as a very respectable document scanner, and while Live Text means you can extract text from images, it’s entirely possible to digitize an entire document. Because it’s buried in the Notes app, though, you may not have spotted how to do it.
Once the scan is saved, you can sign it, too, or just share it via any email or messaging app. It’s not got the same level of quality as a bespoke scanner, but it’s not far off, and will certainly do in a pinch.
Not convinced? Be sure to check our list of the best document scanning apps .
7. Use your camera flash as a notification
One final camera trick, which is a little different. As an accessibility feature, you can trigger your iPhone’s camera flash to go off when you receive a notification, providing a more visual way of knowing someone is calling or messaging.
You can also trigger it to only work when your phone is on silent, which is ideal if you’d prefer your phone not to vibrate on a desk.
8. Master Control Center
Introduced as part of iOS 7 all the way back in 2013, Control Center has moved from the bottom of the screen to the top as the years have gone by, and it has a lot more utility than you may be aware of.
While Apple doesn’t offer Force Touch these days, you can long-press on Control Center icons to get additional options.
Through this, you can enable Spatial Audio with compatible earphones, pick a Focus mode, get a better look at what’s playing on your audio app, or even go two layers deep – the quadrant with Airplane Mode, Wi-Fi, Bluetooth and mobile signal can be expanded to allow you to easily select a Wi-Fi access point, for example.
9. Recognize any song with Shazam in the Control Center
Remember Shazam? The music recognition service was purchased by Apple in 2018 and remains a great way to identify whatever song is playing – whether you’re in a store, at a party, or just missed the name on the radio.
While Shazam has an app, you can also add it to your iPhone’s Control Center for easy access.
Now, whenever you hear a great song playing, you can pull down from Control Center and hit the Shazam icon to find out what’s playing. If you’re on Apple Music, it’ll even give you the option to add the track to your library.
The Oculus Quest 2 is one step closer to its death
Meta has taken yet another step towards killing off the Oculus Quest 2 for good, as its rebranding efforts consume one of the last holdouts using the Oculus name and logo.
The Oculus store is no more and has now been replaced by the new Meta store . Here you can pick up the Meta Quest 2 VR headset (which is functionally identical to the Oculus Quest 2) and the Meta Portal smart display (formerly called Facebook Portal).
Now, the only fragments that remain from the before times are the Oculus app on PC and smartphones . However, we expect they too will fall to Meta’s rebranding efforts in the not too distant future.

Meta, there's still time to go back to Oculus
Meta, sorry but your whole rebrand has been a total mess from the beginning - but there's still time to go back.
For starters, I think it’s time we agree that the name sucks, at least compared to Oculus.
Meta is the business name equivalent of using xXEdgeLord420Xx as your Xbox Gamertag . While a device called Oculus Quest oozes cool, futuristic vibes, Meta Quest has to be spoken in hushed tones for fear of sounding like an utter dweeb.
Plus, the situation hasn't been helped by the unnecessarily slow rollout.
The Meta rebrand was announced six months ago in October 2021, but we didn’t see Meta branded headsets and packaging hit store shelves until 2022. Your own Oculus store didn’t get a rebrand until just now and the apps are still confusingly stuck with the old Oculus name and logo.
Thanks to this snail’s pace and confusing rebrand - and without something like a Meta Quest 3 headset to promote the name change - it’s no surprise to see that no one calls your device what you want them to.
If we grab the Google Trends data for the last six months - which tracks and compares the popularity of terms based on how frequently they're searched in Google - we can see that “Meta Quest 2” barely makes a splash compared with “Oculus Quest 2”.
Even if we just compare searches for the last 90 days - to remove that spike around Christmas day - “Meta Quest 2” still isn’t being searched, while “Oculus Quest 2” remains fairly popular.
But here lies your opportunity to reverse course. The Meta name hasn’t usurped Oculus, so you can reinstate your old branding and hardly anyone will notice it was ever different. And those that do spot the change will let it go, as Oculus is clearly the better choice.
You've already let platforms like Facebook become an uncool mess - and your users have started to abandon it . Maybe don't try the same tactic of ignoring your userbase and make the Metaverse go the same way before it has even had a chance to succeed.